
Robust Magnetic Roof Mount Guide for Starlink MiniUpdated 19 hours ago
Welcome to your new Spacetek Robust Magnetic Roof Mount for Starlink Mini.
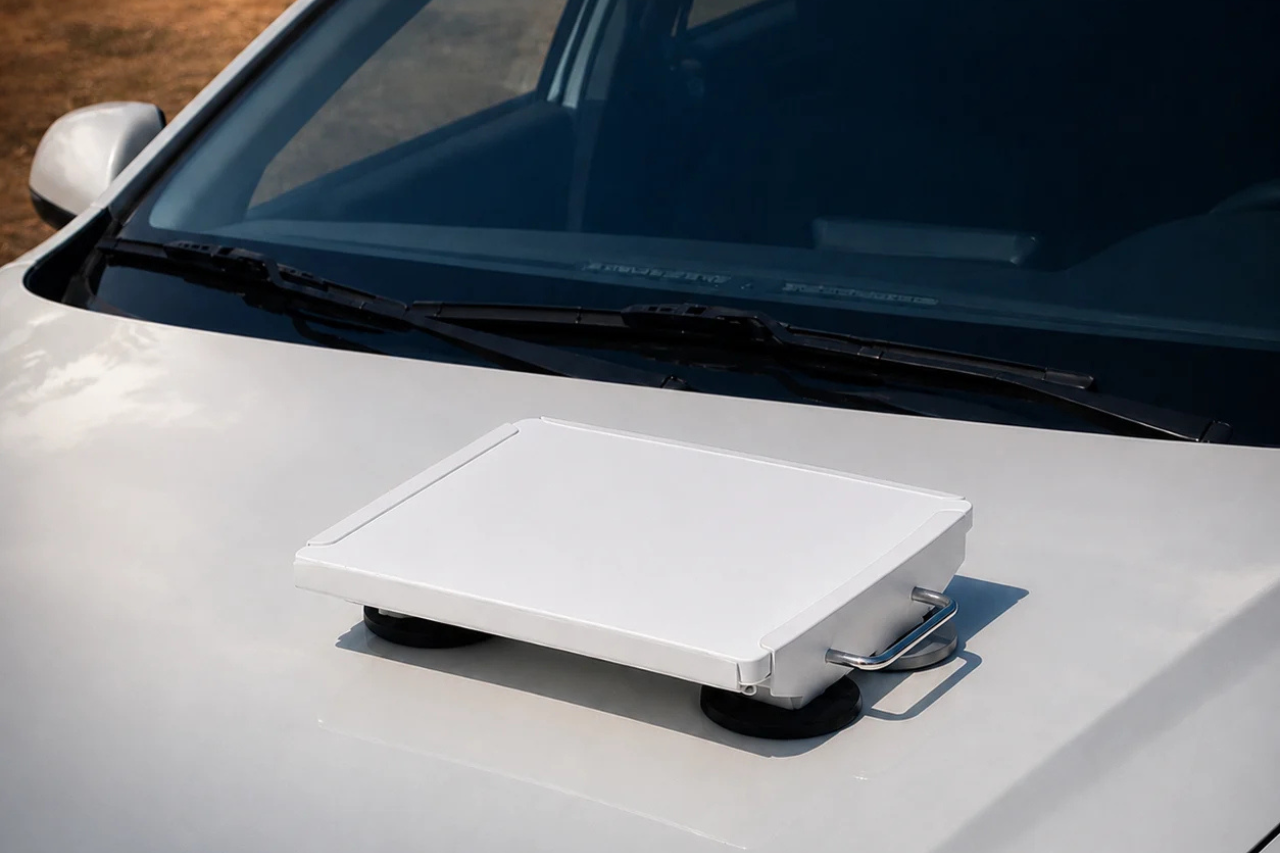
Designed and manufactured in Australia, this mount provides a clean, vehicle-ready mounting option for Starlink Mini using strong magnetic feet, a powder-coated mount body and an integrated carry handle.
This guide covers what you need to know before installation, including surface preparation, magnetic mounting checks, assembly notes and helpful FAQs.
Before You Get Started
⚠️ The Robust Magnetic Roof Mount is designed to be used on a clean, flat metal vehicle surface.
Before placing the mount on a vehicle, always check that the surface is suitable and that all magnets can sit flat with full contact.
Before installation we recommend:
Laying out all parts before starting
Checking that all magnets are firmly attached to the mount base
Confirming the Starlink Mini, cover, handle and screws are secure
Choosing a clean, smooth and flat metal area on the vehicle
Wiping away dust, moisture or debris before positioning the mount
Checking that all magnets sit firmly before driving
Avoid placing the mount on plastic, glass, dirty, curved, damaged, uneven or unstable surfaces, as this may reduce magnetic hold.
Taking a little extra time to prepare the surface can help ensure a cleaner setup and more secure vehicle-mounted installation.
Important Installation Notes
This mount is designed for external vehicle roof use with Starlink Mini.
It is not designed for dashboard mounting, glass mounting, plastic surfaces, non-metal roofs or unstable surfaces.
Magnetic hold depends on the condition, shape, material and cleanliness of the surface being used. Always confirm the mount is secure before travelling or operating the vehicle.
Although the mount is designed for vehicle use, any in-motion use remains the user’s responsibility. Always follow local road rules and check the mount before each trip.
What’s Included
Your kit may vary slightly depending on colour or product version, but the Robust Magnetic Roof Mount kit generally includes:
Robust magnetic mount base
Cover section
Integrated carry handle
Four circular 87mm magnets
Bolt and fastener pack
Please note: the Starlink Mini dish is not included with this mount.
Tools Required
You will need basic tools for assembly, including:
Allen key
Screwdriver or suitable driver bit, depending on the supplied fasteners
Clean cloth for wiping the vehicle surface before mounting
No drilling is required for normal magnetic mounting.
Setup Video
Watch our setup video to see what is involved in assembling and positioning the Robust Magnetic Roof Mount.
[The installation video is being made.]
Please note: always follow the magnetic surface checks in this guide before placing the mount on a vehicle.
Download the Quick Start Guide
Download the installation guide before assembling the mount.
We recommend reading through the full guide before fitting the Starlink Mini or placing the mount on a vehicle.
Installation Overview
The installation process generally follows this order:
Lay out the mount base, cover, handle, magnets, screws and hardware.
Attach the handle to the cover using the supplied screws.
Tighten both handle screws evenly.
Fasten one circular magnet to each corner of the mount base.
Tighten each magnet until secure.
Slide the Starlink Mini into the metal tray until it sits flat and properly aligned.
Place the cover onto the tray and align it with the mounting holes.
Adjust the cover position if needed.
Tighten the screws to secure the Starlink Mini.
Place the mount on a clean, flat metal vehicle surface.
Check that all magnets sit firmly with full surface contact.
Use the handle to safely lift and carry the mount when moving or storing it.
Before driving, check that the Starlink Mini is secure, the cover is tightened, the magnets are firmly attached and the mount is seated correctly on the vehicle surface.
Frequently Asked Questions
Is this mount suitable for Starlink Mini?
Yes. This mount is designed for Starlink Mini and provides a vehicle-ready magnetic roof mounting option.
Does installation require drilling?
No. Normal magnetic mounting does not require drilling into the vehicle. The mount relies on magnetic feet and must only be used on a suitable clean, flat metal surface.
Can I place the mount on glass, plastic or a curved roof section?
No. Avoid glass, plastic, non-metal, curved, uneven, dirty, damaged or unstable surfaces. These can reduce magnetic contact and may affect the mount’s hold.
Are the magnets included?
Yes. The kit generally includes four circular 87mm magnets, along with the mount base, cover, handle and fasteners.
Can this be used while driving?
The mount is designed for vehicle roof use, but any in-motion use remains the user’s responsibility. Always check the mount before driving, confirm all magnets have full contact and follow local road rules.
What should I check before each trip?
Before driving, check that the vehicle surface is clean, all magnets are firmly attached, the mount is seated flat, the Starlink Mini is secure, the cover screws are tight and the cable is safely routed.
Need Help?
If you have any questions, we’re here to help.
Browse the Help Centre, reply to any Spacetek email or submit a support request through our Help Centre.
Thank you for choosing Spacetek.
We look forward to helping you get the most from your Starlink Mini setup.